Building A Playground with Nuxt and Markdown
I've been playing around with Nuxt lately for prototyping ideas for myself and for clients. I've really liked having the ability to bootstrap an app from the command line with a handful of really useful base tools. Nuxt has some goodies that I can take advantage of right off the bat:
- It's a framework for creating Vue apps that abstracts away the client/server complexities. This means we can use it as a jumping-off point for a new app or to plug into existing APIs.
- A command line that generates a shell app from a starter template, where server-side rendering is built-in for SEO and quick load times.
- Pulling in a server-side framework (if necessary, but it's not always), a UI framework, a testing framework, linting and prettifying, a library (Axios) for making HTTP requests.
For this project, I wanted a basic markdown blog experience with Vue and Nuxt so that I can have a playground for both.
Here's how that went and how you can roll your own too. We'll run through these steps:
- Create a Shell App
- Load Markdown Files
- Show a Blog Post
- Show a List of Posts
- Generate Dynamic Routes for Static Site
And end up with this.
Or if you're impatient, grab it from the GitHub repo here.
Create a Shell App
Create a shell app from the default Nuxt starter template by running the following from your command line:
yarn create nuxt-app starter-for-nuxt-markdown-blog
Here's what that output looks like:
➜  examples yarn create nuxt-app starter-for-nuxt-markdown-blog
yarn create v1.17.3
[1/4] 🔍  Resolving packages...
[2/4] 🚚  Fetching packages...
[3/4] 🔗  Linking dependencies...
[4/4] 🔨  Building fresh packages...

success Installed "create-nuxt-app@2.10.1" with binaries:
      - create-nuxt-app
[#################################################################################################################################################################################################] 373/373
create-nuxt-app v2.10.1
✨  Generating Nuxt.js project in starter-for-nuxt-markdown-blog
? Project name starter-for-nuxt-markdown-blog
? Project description Starter for a Nuxt Markdown Blog
? Author name Jenna Pederson
? Choose the package manager Yarn
? Choose UI framework Bulma
? Choose custom server framework None (Recommended)
? Choose Nuxt.js modules (Press <space> to select, <a> to toggle all, <i> to invert selection)
? Choose linting tools ESLint
? Choose test framework None
? Choose rendering mode Universal (SSR)
? Choose development tools jsconfig.json (Recommended for VS Code)
yarn run v1.17.3
$ eslint --ext .js,.vue --ignore-path .gitignore . --fix
✨  Done in 3.35s.

🎉  Successfully created project starter-for-nuxt-markdown-blog

  To get started:

	cd starter-for-nuxt-markdown-blog
	yarn dev

  To build & start for production:

	cd starter-for-nuxt-markdown-blog
	yarn build
	yarn start

✨  Done in 191.25s.
After creating the app, check out what the default Nuxt starter template looks like by spinning it up with:
yarn dev
Then head on over to http://localhost:3000.
Load Markdown Files
Next, we'll use the frontmatter-markdown-loader package to pull in markdown files from a directory named content and gain access to markdown frontmatter (metadata about the markdown file, in this case, post metadata like the title, tags, a hero image) for each post.
Add the package:
yarn add frontmatter-markdown-loader
Create the content directory:
mkdir -P content/blog
To create the first post, drop this file in content/blog.
Then create an associated directory for image assets:
mkdir -P assets/images/blog
And add this image to assets/images/blog.
Now that we have some content, we can extend the webpack config by adding the frontmatter-markdown-loader to the build step in nuxt.config.js:
build: {
	...
	extend(config, ctx) {
	  config.module.rules.push(
	    {
	        test: /\.md$/,
	        include: path.resolve(__dirname, "content"),
	        loader: "frontmatter-markdown-loader",
	    }
	  );
	}
}
Show a Blog Post
We don't need to create static pages for each post we have, so instead, we'll use dynamic routing to pull in the markdown file. Consider the following URL paths:
/blog/2019-09-22-veggies
/blog/:blog_post_title
or
/users/jenna-pederson
/users/:username
In both of these examples, :blog_post_title and :username represent the dynamic part of the route, or the slug.
Create the blog directory:
mkdir pages/blog
We'll create the blog directory and add a _slug.vue file. This _slug.vue file will be the Vue template for our blog post. In pages/blog/_slug.vue, add the following basic template:
    <template>
      <div class="container">
        <h1 class="title">
          {{ post.attributes.title }}
        </h1>
        <h2 class="subtitle">
          {{ post.attributes.date }}
        </h2>
        <div class="columns">
          <div class="column is-half is-offset-one-quarter">
            <figure class="image">
              <img :src="imgSrc">
            </figure>
          </div>
        </div>
        <!-- eslint-disable-next-line -->
        <div class="content" v-html="post.html" />
      </div>
    </template>
    <script>
    export default {
      computed: {
        imgSrc () {
          return require(`~/assets/images/blog/${this.post.attributes.hero}`)
        }
      },
      async asyncData ({ params }) {
        try {
          const post = await import(`~/content/blog/${params.slug}.md`)
          return {
            post
          }
        } catch (error) {
          return false
        }
      },
      head () {
        return {
          title: this.post.attributes.title
        }
      }
    }
    </script>
In asyncData we've imported the markdown file based on the slug value that we get from the params. Again, the slug is defined by the URL. For instance, the slug for our URL http://localhost:3000/blog/2019-09-22-veggies is 2019-09-22-veggies, so this will import the 2019-09-22-veggies.md file and assign the post object to the component's data.
We're using the v-html directive in order to render raw HTML from our markdown. This causes an eslint warning:
9:26 warning 'v-html' directive can lead to XSS attack vue/no-v-html
You can read more about XSS vulnerabilities here and here. Be sure you know where your content is coming from — if you're writing it, know that even third-party UI libraries can create security vulnerabilities. We can get rid this warning of by ignoring it with the eslint-disable-next-line line directly above.
Now we can point our browser at http://localhost:3000/blog/2019-09-22-veggies and see the post!
Show a List of Posts
The next step is to be able to show a list of blog posts from our home page and be able to navigate to each individual post.
So that we have more than one post to show in our blog post list, add this post to content/blog and it's image to assets/images/blog.
In pages/index.vue, we're going to use Nuxt's asyncData method again to load all the blog posts so that we can display them on the page. In the future, we could paginate these or only load in featured posts to display on the home page of the site. We'll then add a v-for loop in the template to display the posts.
    <template>
      <div class="container">
        <h1 class="title">
          Blog Posts
        </h1>
        <section class="posts">
          <div v-for="post in posts" :key="post.attributes.title" class="columns">
            <div class="column is-one-quarter">
              <figure class="image">
                <img :src="imgSrc(post)" :alt="post.attributes.title">
              </figure>
            </div>
            <div class="column is-three-quarters">
              <p class="title is-4">
                <nuxt-link :to="post._path">
                  {{ post.attributes.title }}
                </nuxt-link>
              </p>
              <p class="subtitle is-6">
                {{ post.attributes.tags }}
              </p>
              <div class="content">
                <p>{{ post.attributes.excerpt }}</p>
                <p>{{ post.attributes.date }}</p>
                <nuxt-link :to="post._path">
                  Read
                </nuxt-link>
              </div>
            </div>
          </div>
        </section>
      </div>
    </template>

    <script>
    export default {
      async asyncData () {
        const context = await require.context('~/content/blog', true, /\.md$/)
        const posts = await context.keys().map(key => ({
          ...context(key),
          _path: `/blog/${key.replace('.md', '').replace('./', '')}`
        }))
        return { posts: posts.reverse() }
      },
      methods: {
        imgSrc (post) {
          return require(`~/assets/images/blog/${post.attributes.hero}`)
        }
      }
    }

    </script>
Here we're loading in all the markdown files in the content/blog directory and any subdirectories (as indicated by true). Then we're mapping each key (the file name) to its context and anything else we want. In this case, we're also mapping _path to the URL path to the post so we can build links later. The context ends up being what frontmatter-markdown-loader loads: attributes (the frontmatter of the markdown file) and html (the markdown compiled to HTML).
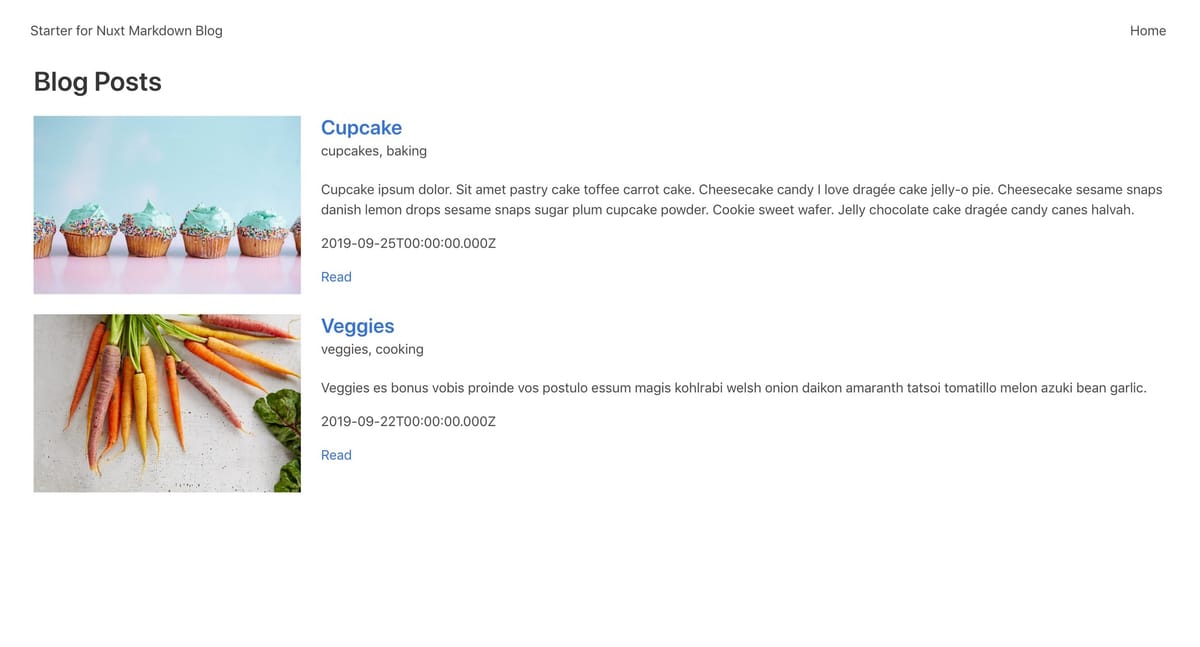
Now, when we point our browser back to http://localhost:3000/ we should see this:

Generate Dynamic Routes for Static Site
We still have one step left and that is to set up the dynamic routes to work with yarn generate, the step that generates a static site for production. In nuxt.config.js, we're going generate routes based on the markdown files we have in the content directory.
First, add const glob = require('glob') at the top of the file and then define markdownPaths there as well:
const markdownPaths = ['blog']
This will be an array of... paths to our markdown files. In our case, we only have one, but you could extend this to be ['blog', 'portfolio', 'photos', 'recipes'] or whatever you need.
Then at the bottom of this file, we'll add this function:
function dynamicMarkdownRoutes() {
  return [].concat(
    ...markdownPaths.map(mdPath => {
      return glob.sync(`${mdPath}/*.md`, { cwd: 'content' })
        .map(filepath => `${mdPath}/${path.basename(filepath, '.md')}`);
    })
  );
}
We'll call that function in the generate.routes block. This can be added at the same level as modules or build:
generate: {
  routes: dynamicMarkdownRoutes()
},
To test this out, we'll head back to the command line and run yarn generate, which should produce this output:
➜  starter-for-nuxt-markdown-blog git:(master) ✗ yarn generate
yarn run v1.17.3
$ nuxt generate
ℹ Production build                                                                                                                                                                                16:54:52
✔ Builder initialized                                                                                                                                                                             16:54:52
✔ Nuxt files generated                                                                                                                                                                            16:54:52

✔ Client
  Compiled successfully in 6.85s

✔ Server
  Compiled successfully in 2.18s


Hash: edf5326aac7133378e50
Version: webpack 4.40.2
Time: 6853ms
Built at: 2019-09-25 16:55:01
                         Asset       Size   Chunks                                Chunk Names
../server/client.manifest.json   7.26 KiB           [emitted]
       125f300a35d8d87618b7.js   2.08 KiB        2  [emitted] [immutable]         pages/blog/_slug
       2eef474de7f0fce0b490.js   2.29 KiB        7  [emitted] [immutable]
       47f38e821f6391ec3abe.js   2.38 KiB        4  [emitted] [immutable]         runtime
       50c6bbcdbcd3e3f623ea.js   34.9 KiB        0  [emitted] [immutable]         app
       72339ed6891dc9a5bab0.js    192 KiB        5  [emitted] [immutable]         vendors.app
                      LICENSES  389 bytes           [emitted]
       d6bf890be21b759c97e5.js   3.38 KiB        6  [emitted] [immutable]
       dc728afc9091988c21a1.js   8.63 KiB  3, 6, 7  [emitted] [immutable]         pages/index
       fc1ca6aa66dbc344a014.js    152 KiB        1  [emitted] [immutable]         commons.app
               img/8c66f4e.jpg   5.78 MiB           [emitted]              [big]
               img/ca9c582.jpg   1.03 MiB           [emitted]              [big]
 + 2 hidden assets
Entrypoint app = 47f38e821f6391ec3abe.js fc1ca6aa66dbc344a014.js 72339ed6891dc9a5bab0.js 50c6bbcdbcd3e3f623ea.js

WARNING in asset size limit: The following asset(s) exceed the recommended size limit (244 KiB).
This can impact web performance.
Assets:
  img/8c66f4e.jpg (5.78 MiB)
  img/ca9c582.jpg (1.03 MiB)

Hash: 898a2ef2951dc7e6c3b6
Version: webpack 4.40.2
Time: 2180ms
Built at: 2019-09-25 16:55:03
                  Asset       Size   Chunks                         Chunk Names
461c3c4ac5f760555a13.js   1.67 KiB        1  [emitted] [immutable]  pages/blog/_slug
8ca9a115422e5af94cd9.js   2.32 KiB        4  [emitted] [immutable]
abf1051240f49f9b6062.js   3.41 KiB        3  [emitted] [immutable]
ec1f17082565c8004784.js   7.71 KiB  2, 3, 4  [emitted] [immutable]  pages/index
              server.js    214 KiB        0  [emitted]              app
   server.manifest.json  603 bytes           [emitted]
 + 5 hidden assets
Entrypoint app = server.js server.js.map
ℹ Generating pages                                                                                                                                                                                16:55:03

 WARN  Cannot stringify POJOs with symbolic keys Symbol(Symbol.toStringTag)                                                                                                                       16:55:03


 WARN  Cannot stringify POJOs with symbolic keys Symbol(Symbol.toStringTag) (repeated 1 times)                                                                                                    16:55:03

✔ Generated /                                                                                                                                                                                     16:55:04
✔ Generated blog/2019-09-25-cupcake                                                                                                                                                               16:55:04
✔ Generated blog/2019-09-22-veggies                                                                                                                                                               16:55:04
✨  Done in 16.11s.
This will generate your site in the dist directory. If you'd like to test it out (and you probably should!) before deploying it live, you can also run yarn build and then yarn start to start up an HTTP server of the static site in that directory.
Hopefully, this gets you started with building a blog using Nuxt and markdown files! You can grab this version of the code from here. I'll be continuing to update this repo as I build it out more. Maybe we'll dig into those warnings about "cannot stringify POJOs with symbolic keys" or formatting the date display using Moment.js or even hooking it up to a headless CMS next.
Ready to get started with this as your starter on Netlify right now? You can do that too!
